+1 (408) 320-0380
Usually, to make the right business decision, it is important to consider the previous experience of your company. In this case, CRM software with its reporting tool comes in handy showing all the important data, numbers or trends. But what if you don’t have time to study the report and the decision should be taken at once? There is no need to worry. At EspoCRM, we understand how important it is to have the necessary data at hand, that’s why today we’d like to share a recommendation on how to configure report panel functionality, in order to see the report results at a glance.
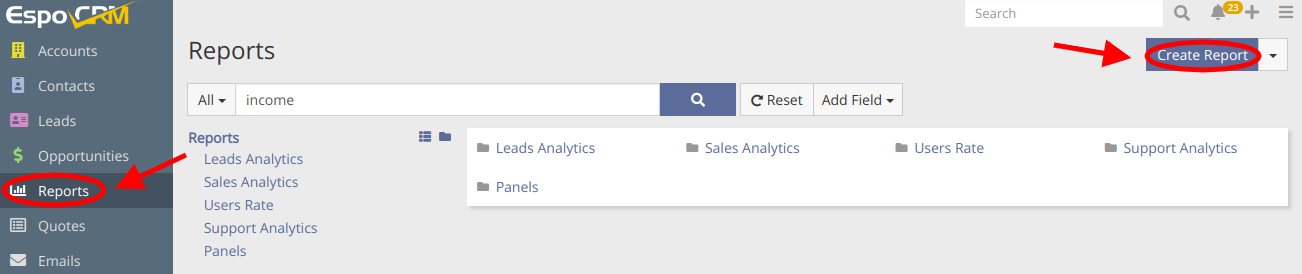
Report panel functionality is available in the detailed view of the specific entity type. It provides quick access to the report results related to the specific entity. Let’s find out how to configure it. The first thing to do here is to select or create the report that will be shown on the report panel. To illustrate the whole process to you, we’ll create the needed report. As an example let’s create a report that will show how much your company earned while working with other companies. To do that, go to Reports > click Create Report button.
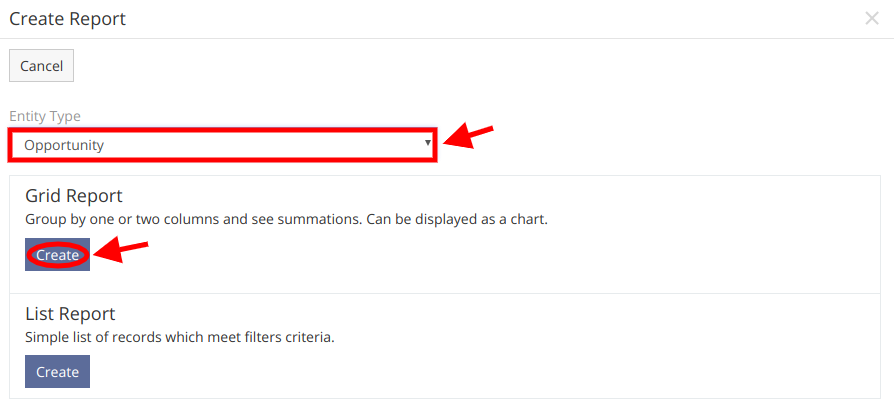
Since the report is connected with the company’s income, the entity type should be “Opportunity” and the report type should be grid. We choose the needed entity from the list and press Create button.
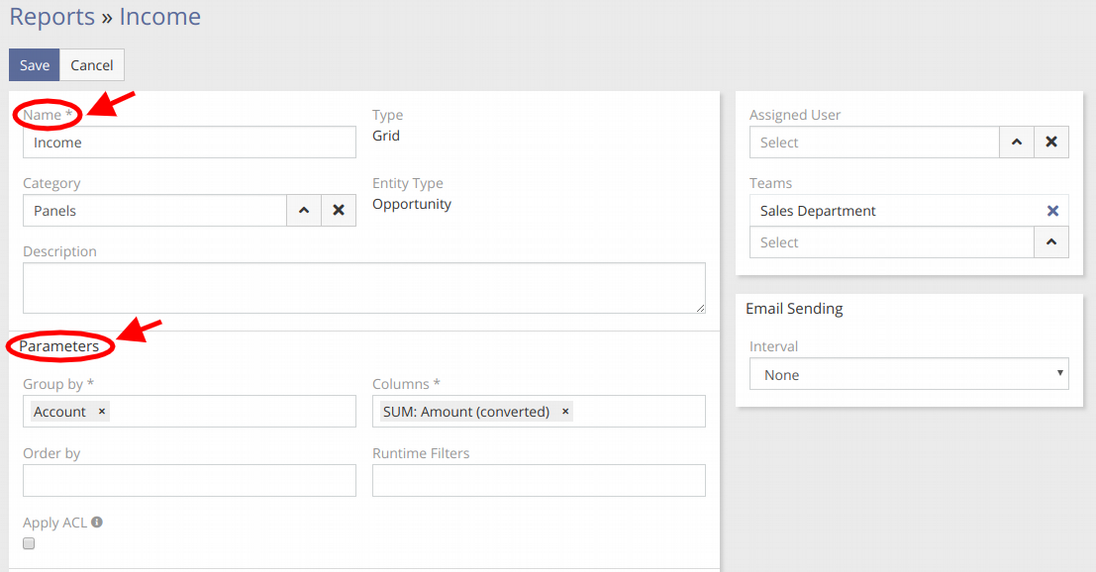
Then, we set the name and specify the report parameters. In our case, the data should be grouped by account and the columns will be created according to the “SUM: Amount (converted)” function.
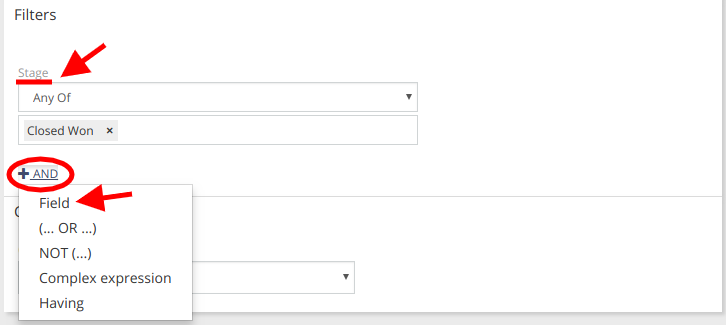
It’ s also extremely important here to specify the criteria that will determine what records will be used in the report at Filters section. Our report should be filtered by the “Closed Won Stage”, so we click on + AND > choose Field > select Stage field and then “Closed Won” option from the list. When all the criteria are specified, we click Save button on the top.
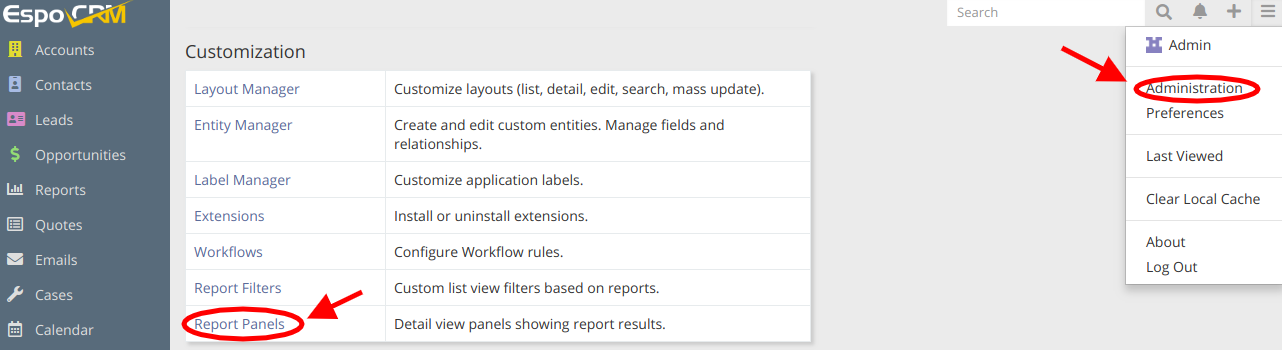
Now, when we have the needed report, the last thing to do is to configure the report panel. We go to Administration > Report panels > click Create Panel button at the top of the page.
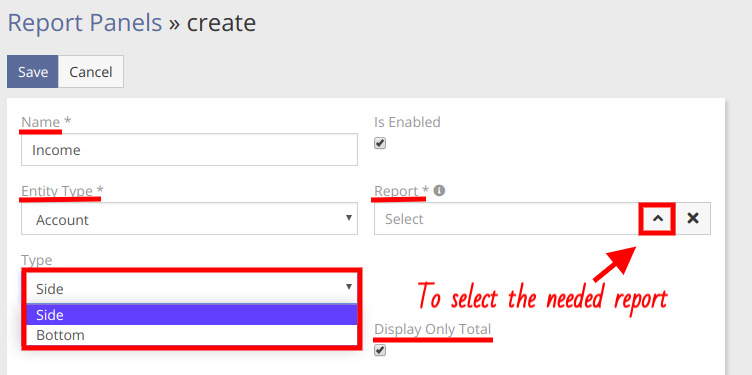
Then, we set the name, choose the entity in the detailed view of which the panel will be available, choose the report that will be displayed on the panel. The Type section has two options (Side and Bottom), which determine the position of the panel in the detailed view. It’s also possible to display only a total amount on the report panel.
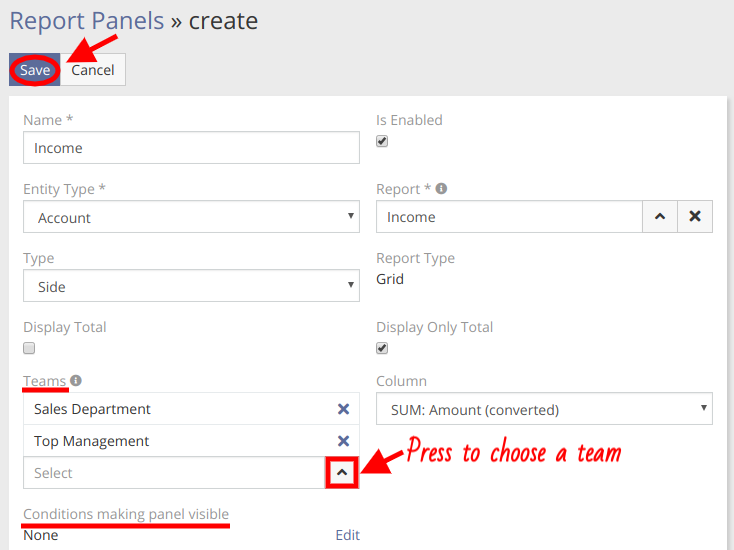
You can also specify which teams will be able to see the panel and set the conditions that will make it visible. In the end, do not forget to click the Save button.
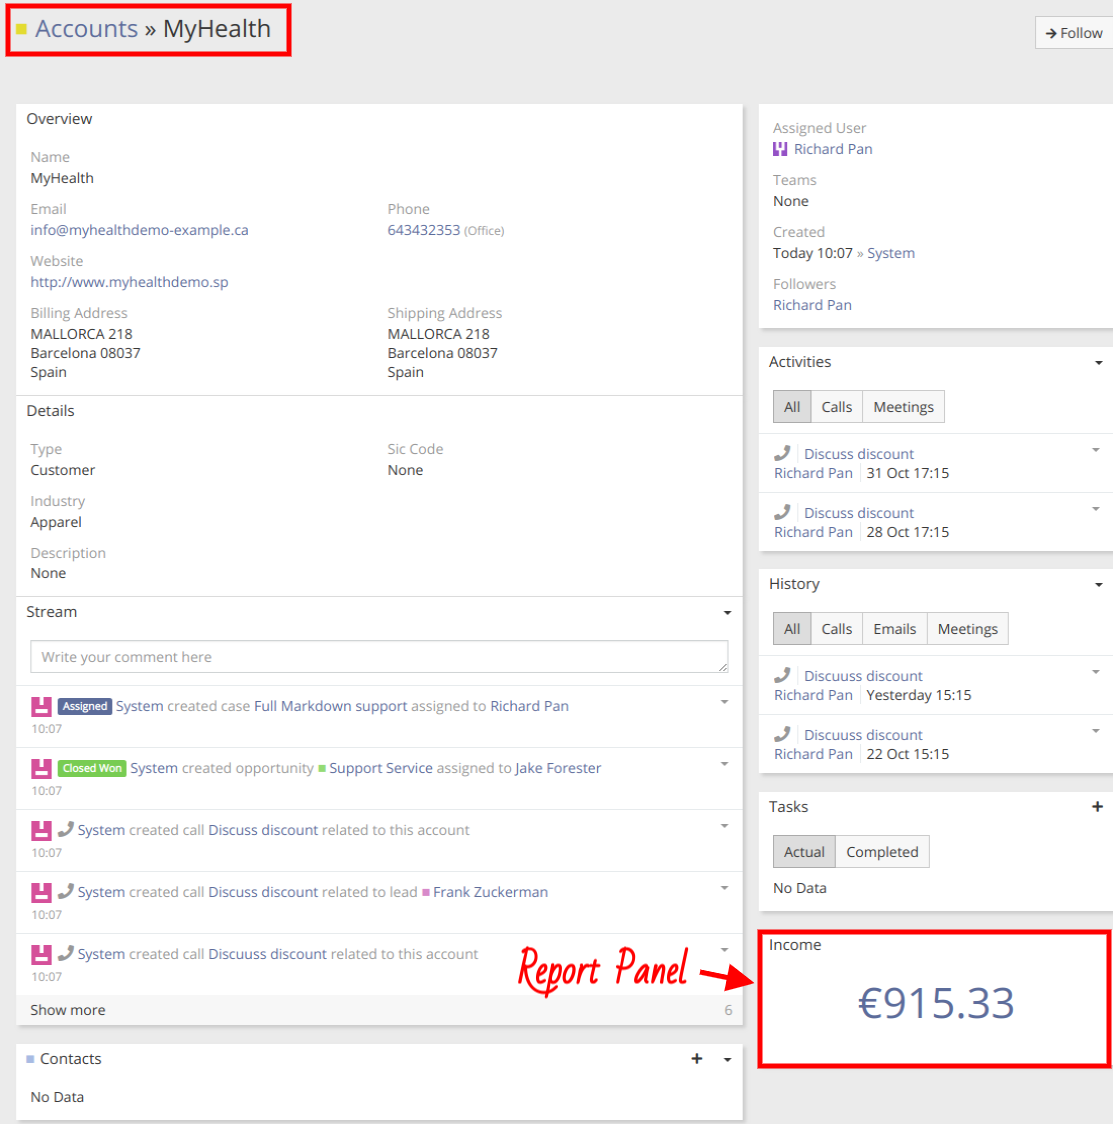
Now let’s see how the newly created Report Panel looks like. We go to Accounts > select, for example, MyHealth > and in the detailed view, we can see the Report Panel which shows how much our company earned while working with MyHealth.
Hope the information was useful for you! Thanks for paying attention!