+1 (408) 320-0380
The key factor in holding successful and productive business meetings is thorough planning and careful organization. Being a powerful tool for efficient time management, EspoCRM enables users to schedule meetings, calls, set popup and email reminders, or send invitations to the attendees through the user interface, so that the invited people won’t forget about the event. What’s even more, the software allows customizing the message templates for various types of notifications, invitations, reminders etc. through the Template Manager feature. So, if you want to add a personal touch to your system notifications, this article is just for you.
To start customizing the message templates, navigate to Administration > Template Manager. There we can see the list of message templates that can be modified. For the illustrative purpose, today we will change the meeting invitation template.
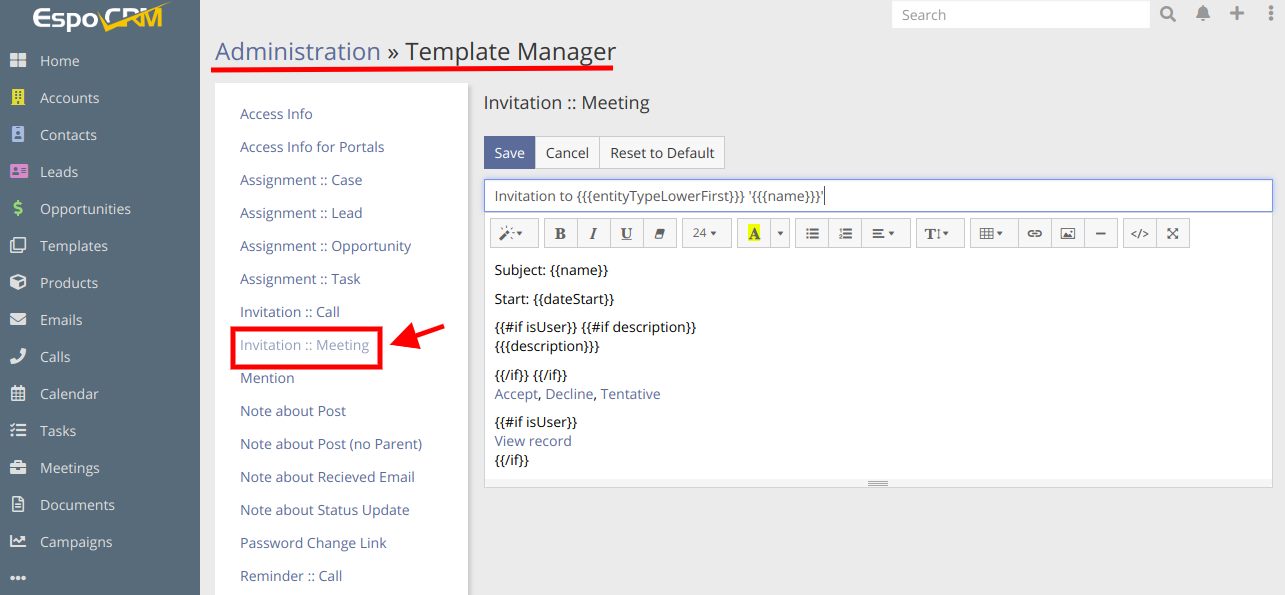
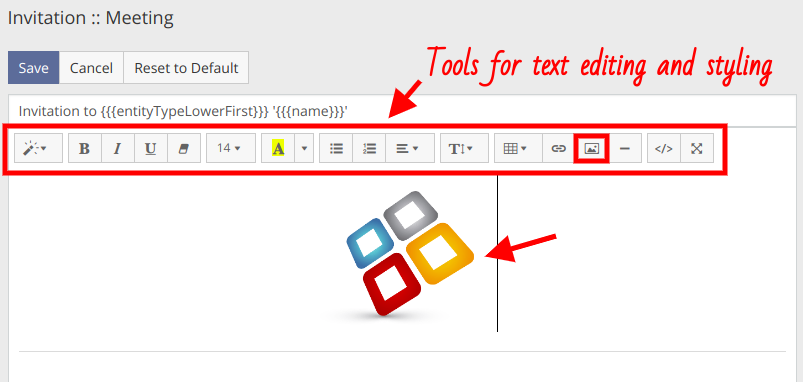
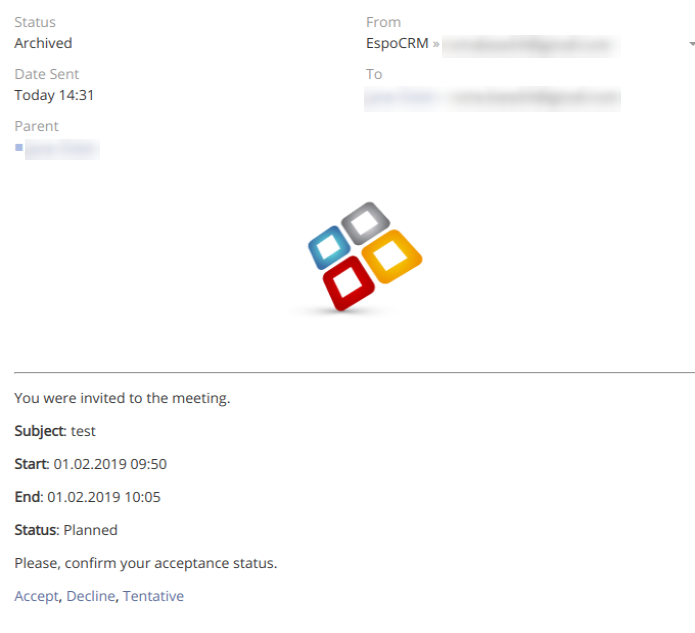
As seen from the picture above, the default email for meeting invitation contains the subject and the information about the time when the meeting begins, the description and the links for attendance status confirmation. The body of the email contains a plethora of tools for text formatting and styling, you can even add tables, insert links and pictures to your email. Let’s customize our meeting invitation by inserting our company logo into it. In order to do that, just click the Picture button and choose the file from your computer.
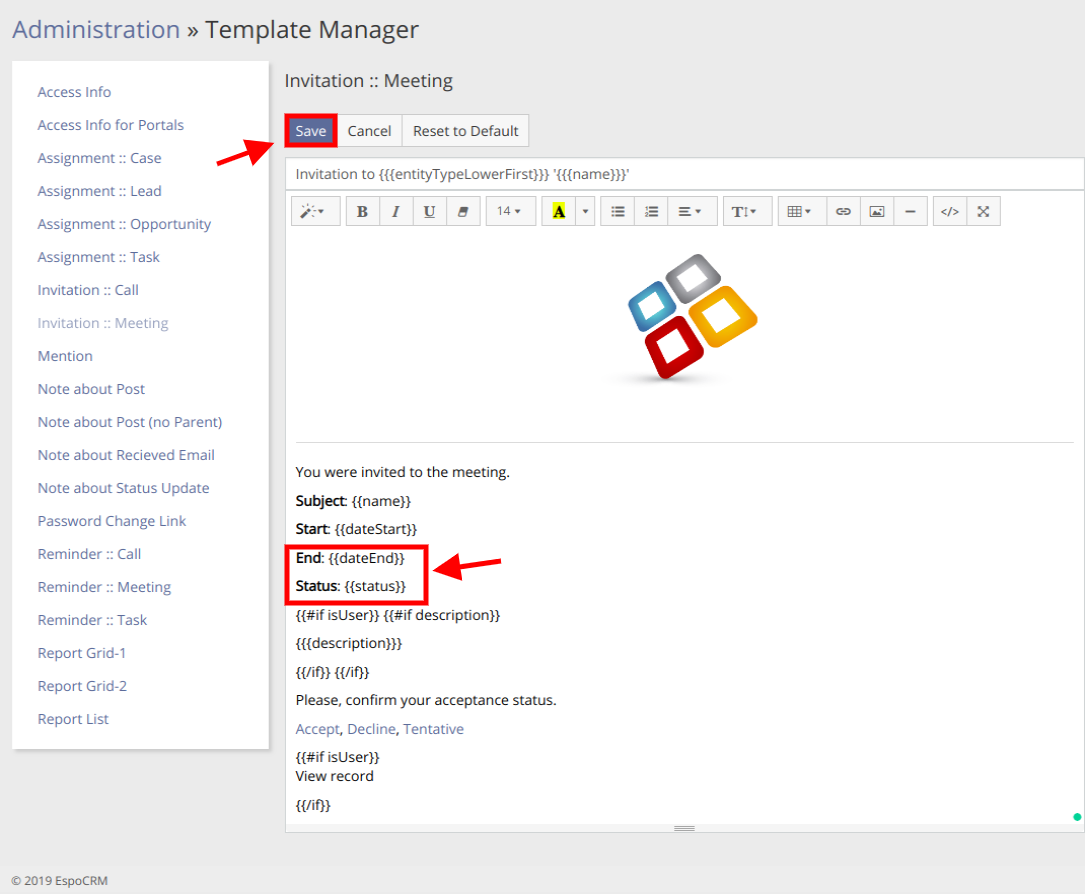
To continue editing the invitation template, let’s also add some text, insert the end date and status of the meeting. To insert the value of the fields into the invitation body, you should write the name of the field (which can be found at Administration > Entity Manager > Specific entity type > Fields) in the curly braces. In our case the placeholders for the end date and meeting status will look like this: {{dateEnd}} and {{status}}. When all the parts of the template are edited to your liking, do not forget to Save it.
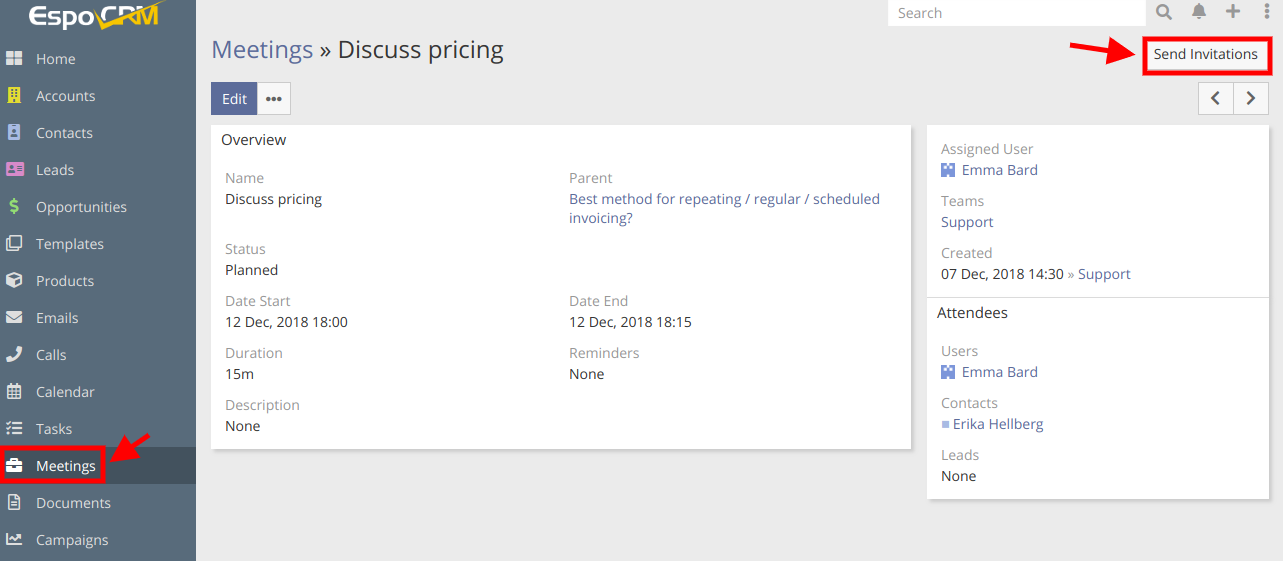
Now, let’s check what our invitation email will look like. We navigate to Meetings > choose the needed one > click “Send invitations” button in the top right corner of the detailed view.
When the invitation is sent, the attendees receive the email which looks like this:
The procedure of customizing other message templates available in the Template Manager is practically the same as described above.
Hope the information was useful for you! Thanks for paying attention!