+1 (408) 320-0380
Gaining a solution for customer problem or query is not an easy task to do, but that is the very thing your clients expect from you. EspoCRM portal functionality helps you to enhance customer experience, automate customer services and save time on case management. Let’s figure out what a portal is and how to use it.
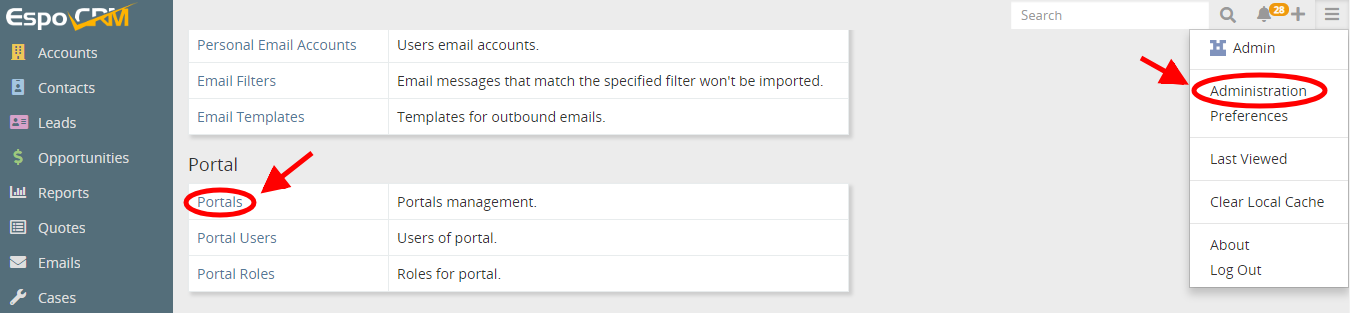
Portal is a functionality that provides the access specific CRM data and functions for your customers and partners. Administrators can create multiple portals, each one having its own settings, dashboard, user list, access control settings. To create a portal, the administrator should go to Administration > Portals > press the Create Portal button.
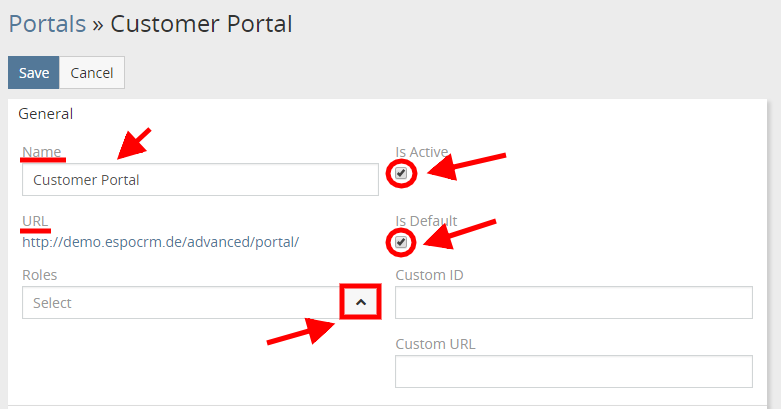
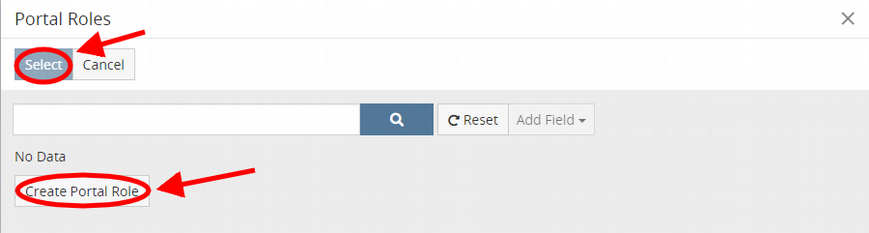
As an example, we’ll create a customer portal today. First of all, let’s set the name and check the Is Active checkbox (to make it available to portal users) and Is Default checkbox (to make it available by URL). Here, you’re also able to specify the Portal Roles. You can either select them if you’ve created portal roles before or determine the new ones by clicking the Create Portal Role button in the next window. Portal roles are similar to regular roles in EspoCRM except for a few distinctions in options about which you can read here. It’s important also to remember that if the portal user roles are set improperly, then the portal user will get access to the whole system.
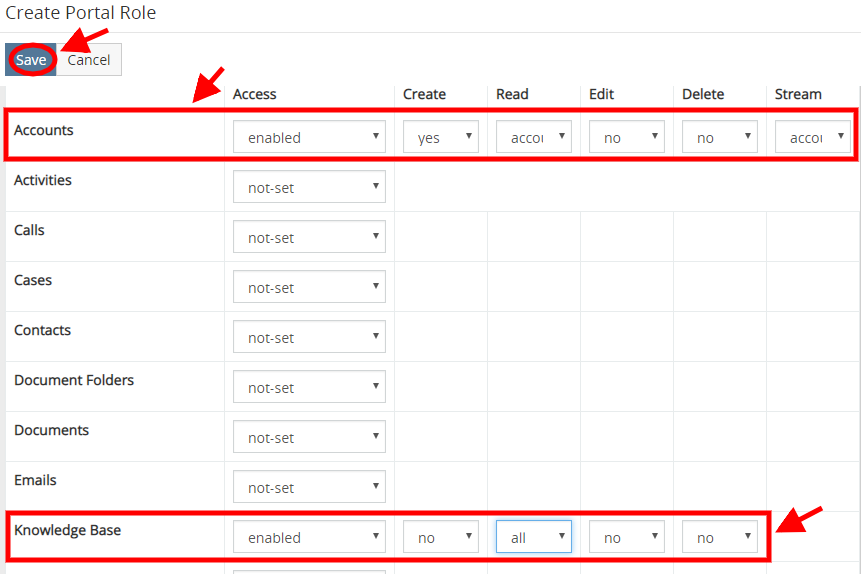
Let’s create a portal role for our Customer Service portal. Our customers should be able to create cases, view cases related to their account; they should be able to view knowledge base. That’s we enable access to Cases by setting the following options: create – “yes”, read – “account”, edit – “no”, delete – “no”, stream – “account”; and to Knowledge Base, by setting the following options: create – “no”, read – “account”, edit – “no”, delete – “no”. Portal roles can also be defined at Administration > Portal Roles.
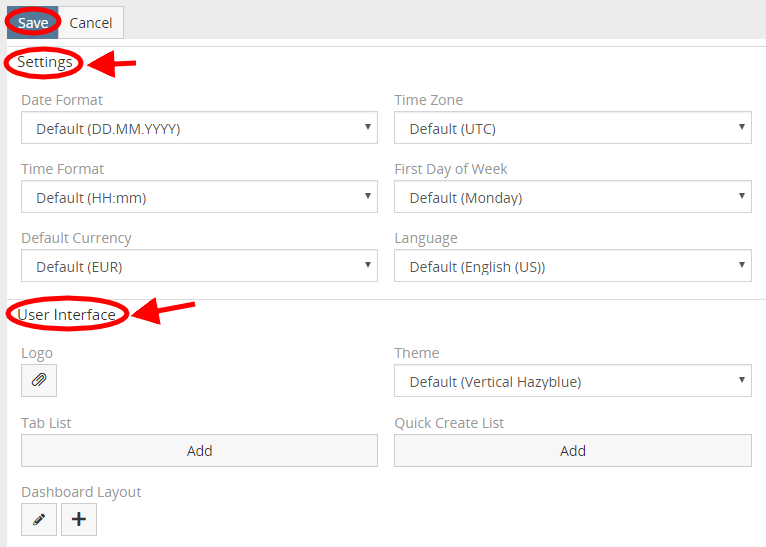
As you can see, here you can change the Settings and configure the user interface by adding logo, configuring dashboard layout, changing theme etc. when you’re through with that, don’t forget to click Save.
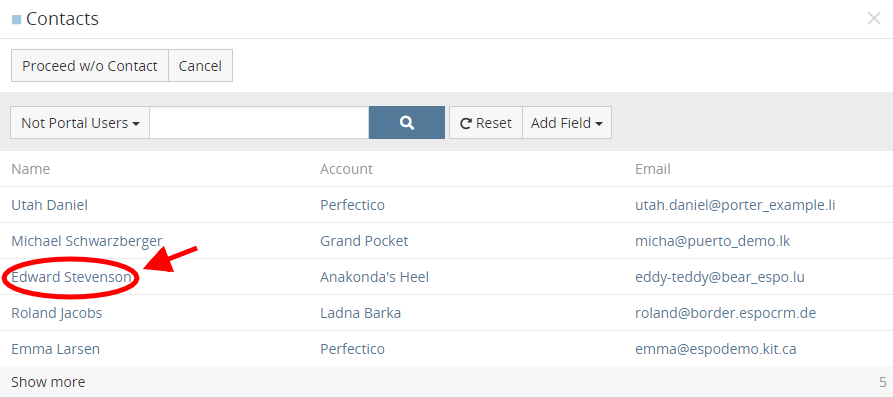
The last thing to do is to create a portal user that will use our portal. To do that, go to Administartion > Portal Users > click Create Portal User button. In the next window choose the contact to which a user will be related to, let it be Edward Stevenson.
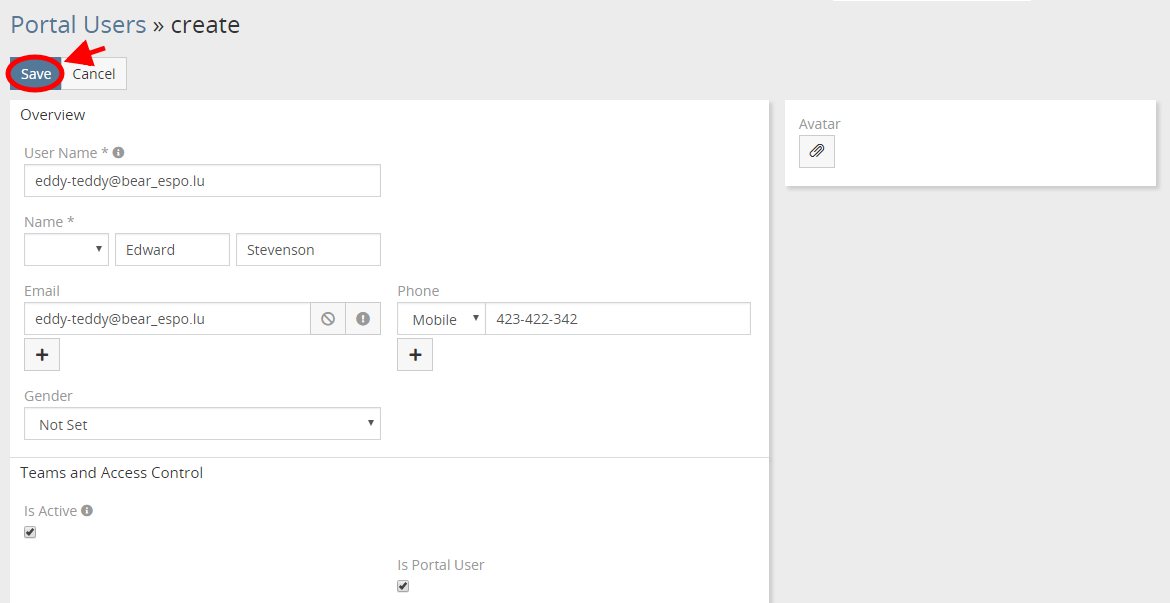
Then, fill in the missing information in the form and press Save button.
Hope the information was useful for you! Thanks for paying attention!