+1 (408) 320-0380
Nowadays, data is far more valuable than the software. At EspoCRM, we believe that data migration is one of the most important features that any CRM should have, as it allows you to have the information readily available if needed. To make data migration possible, our CRM system provides an excellent tool for import and export. Let’s figure out how they work!
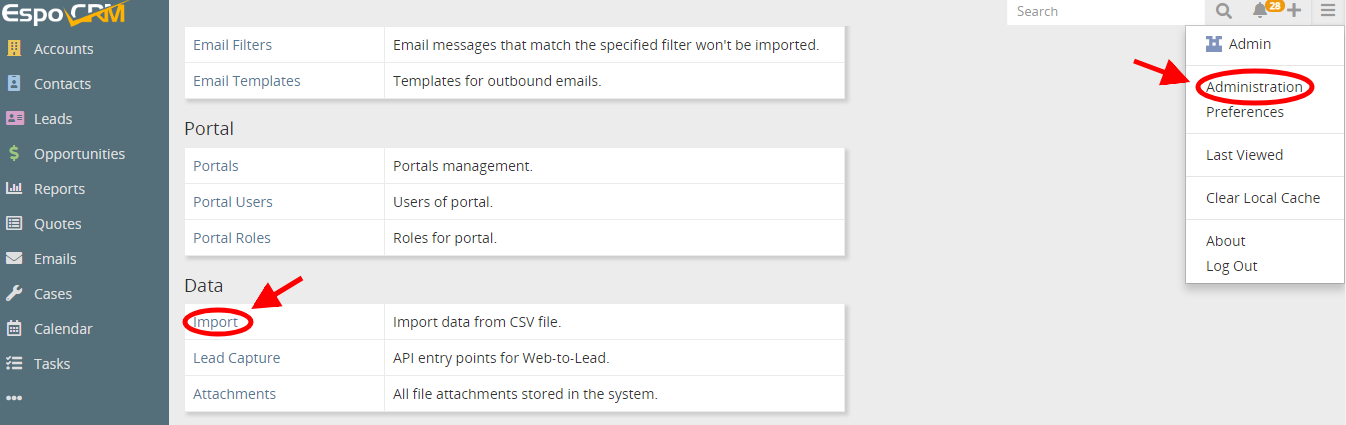
Importing data is probably the first thing you need to do when you installed CRM software. EspoCRM provides the ability to import records from CSV files. To start importing data, go to Administration > Import.
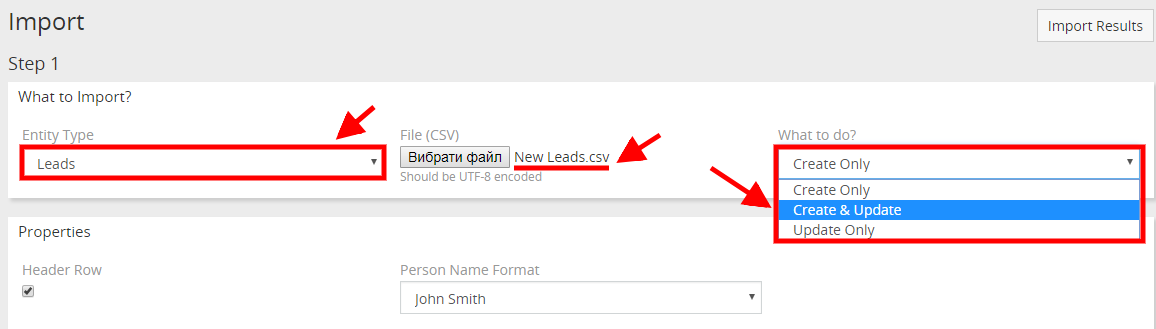
Usually, data import is done in three steps. In Step 1, you should select what type of records you need to import (Entity Type field), choose a CSV file from which the records will be imported and determine what to do with imported records (“Create Only”, “Create & Update”, “Update Only”). As an example, let’s import new leads into the system. So, we select Leads from the list of Entity Types, choose the needed CSV file and decide what to do with records. In our case, we want to create new ones and update the existing ones, that’s why we choose “Create & Update” option.
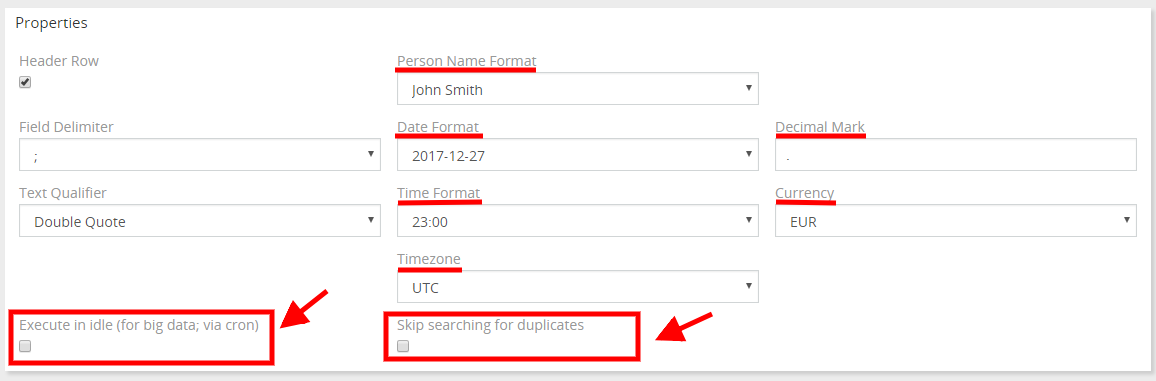
The other thing you have to do here is to set the correct properties for your import. It’s important to check whether the format of the person name, date, time, timezone and currency is correct. You are also able to check the Execute in idle checkbox if you have many records to be imported or Skip searching for duplicates – if you need to decrease import runtime.
In the Preview panel, you will be able to see how the data will be parsed. If you change properties, the preview will be updated. When you’ve checked everything, press the Next button.

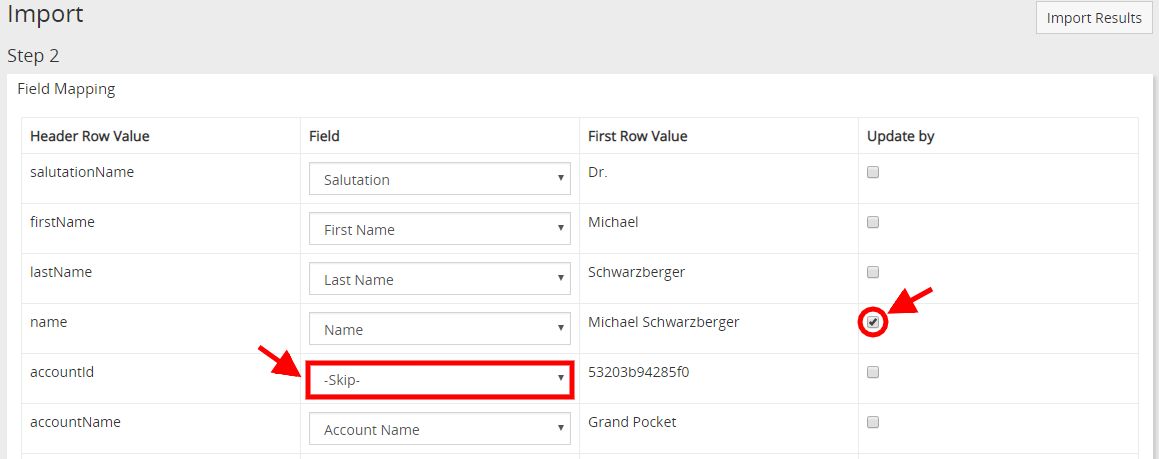
In Step 2, we can see how fields correspond to columns of the CSV file. You can skip not needed columns here by choosing the “Skip” option from the list. In our case we want our records to be created and updated, so we need to check fields by which records that should be updated will be found. Let it be the Name field.
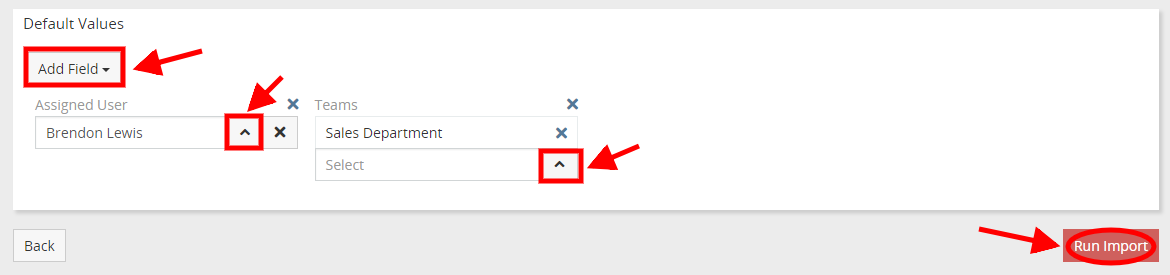
You are also able to add default values that are to be set for new and updated records. For example, let’s specify Assigned User and Teams fields. To do that press the “Add Field” button, choose the needed fields and then choose the entities. Finally, to start the importing process, press the Run Import button (Step 3).
Below we can see the result of our import. If the imported data is fine you can Remove import log (by clicking the button on the import results view) to prevent accidental reverting of the import.

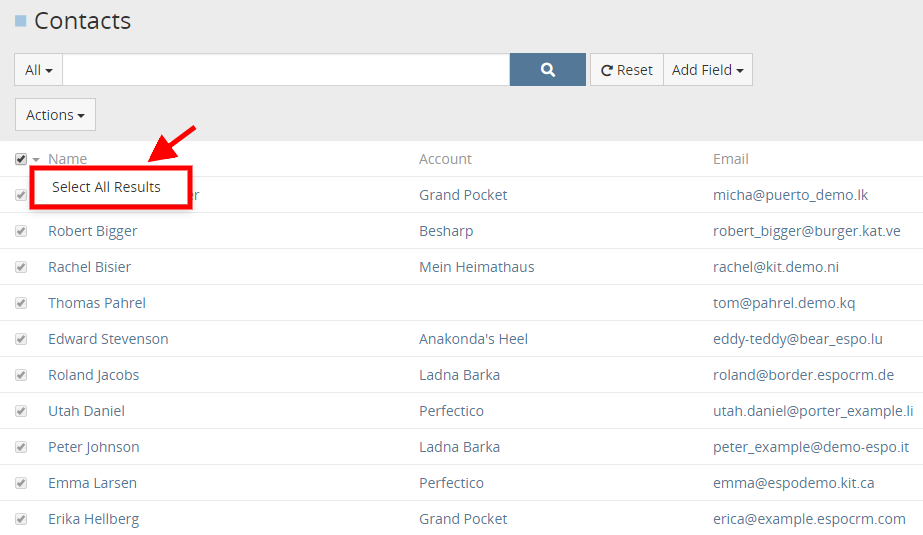
Exporting files is less complicated process. EspoCRM allows exporting records to XLSX (Excel) and CSV formats. As an example, we’ll try to export the information about the contacts. You can choose only several records to be exported or press Select All Results and export all of them.
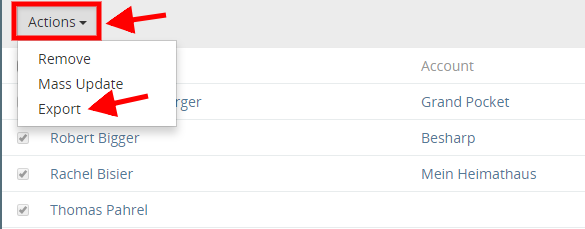
Then, click the Actions dropdown, choose Export option.
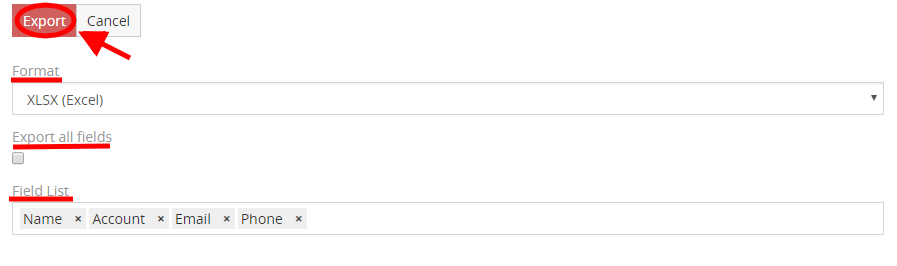
The last thing to do is to specify the export parameters: the format of the export file, specific fields that have to be exported or you can check the Export all fields checkbox to export all available fields. After clicking the Export button the export file will be downloaded.
Hope the information was useful for you! Thanks for paying attention!