+1 (408) 320-0380
Although the way and means of communication have changed a lot over the past few decades, emails are still remaining one of the most important forms of business communication. Regardless of the type and size of your business, you must be using email for everyday communication with your business partners, current or potential customers, etc.
However, sometimes it happens so, that the amount of received emails is so huge that it drains all your time and energy. In the end you’re allotting more time and efforts for reading and answering emails than for carrying out important tasks. If the situation described above sounds quite familiar to you, then EspoCRM’s Folders & Filters features for emails will come in handy for you. These features will prevent your inbox from sinking into the havoc. By filtering and moving your emails into specific folders, Folders & Filters features allow you to organize your incoming mail professionally and bring order into the email chaos you’re facing every single day.
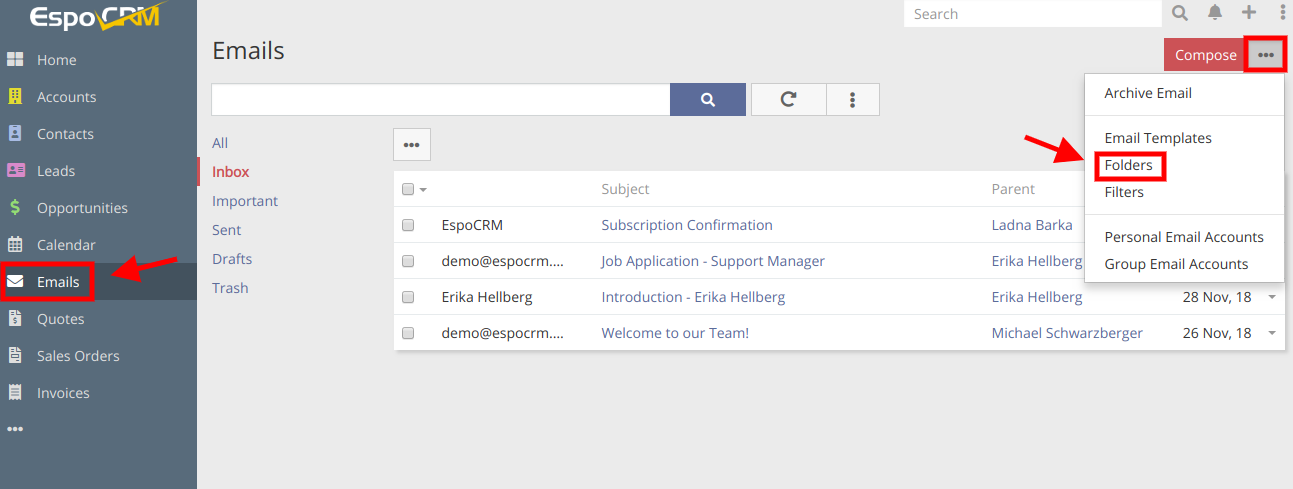
To figure out how the features work, let’s imagine that you’re receiving an important email containing analytics from the sales department daily. Due to a large number of incoming emails, it takes quite a while until you find it. In order to make your life a bit easier, you may configure an email filter that will put these very emails into a specific folder, so you won’t have to search for them every time. To begin with, let’s configure the folder for these emails. To create folders, follow Emails > dropdown in top-right corner > Folders > “+Create folder” button.
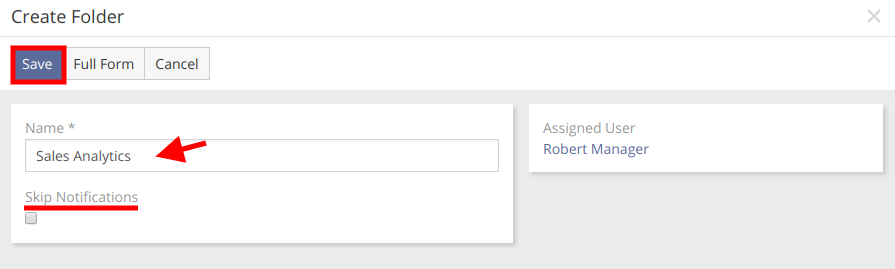
In the Create folder window, we set the Name of the folder, let it be Sales Analytics. You may also enable Skip Notifications option, then you won’t receive the notifications about the incoming emails that will be put into this folder. When all the configurations are set, we Save the folder.
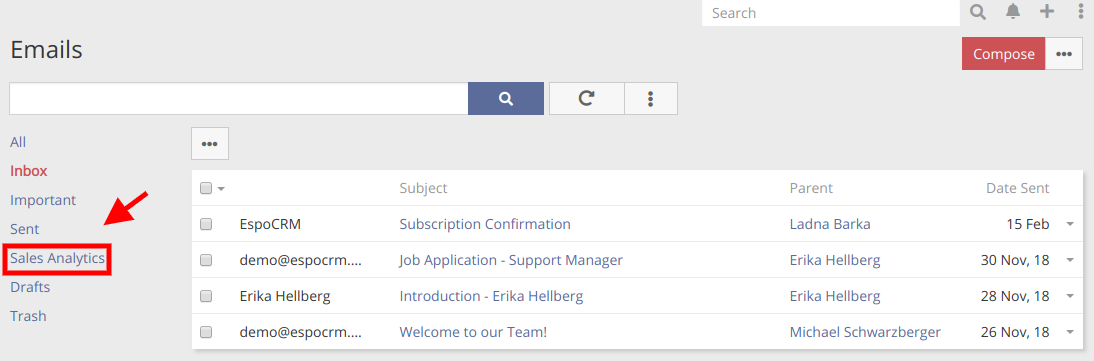
Our newly created folder is available in the folder list at Emails page on the left side.
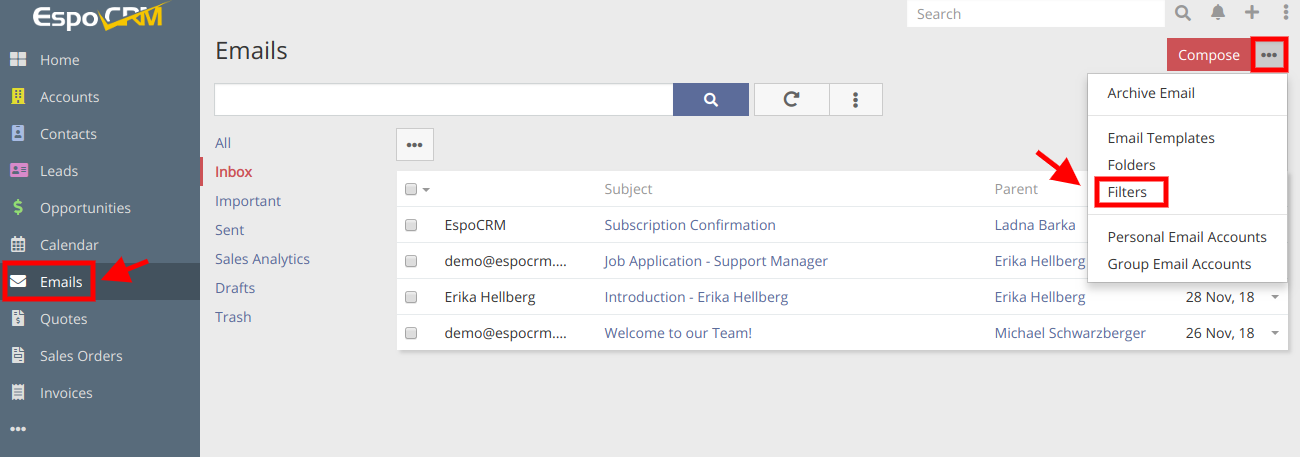
The next step is to create the filter for our emails on sales analytics. An administrator can create global email filters to skip not desirable emails, for example spam. They are available at Administration > Email Filters. Regular users are also able to create email filters for their Personal Email Accounts or for their entire inbox and that is exactly what we need, so we navigate to Emails > dropdown in top-right corner > Filters > “Create Email Filter“ button.
In the next window, we set the Name of the filter (in our case Sales Analytics filter), specify the To email address (in this case it’s our own email), From email address (in this case it’s the email address of the sales department), select User option as Parent and choose the desired user.

Then, we select the Action, the filter should accomplish. There are the following types of actions:
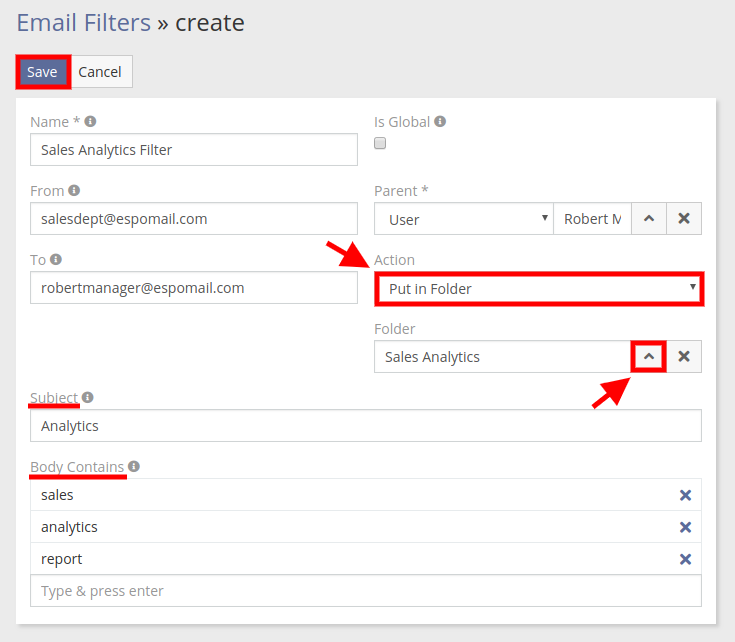
We choose Put in Folder action and select our previously created folder Sales Analytics. As you can see from the picture below, you can also specify the Subject of the email and the words or phrases that it usually contains (in the Body Contains section). When all configurations are set, press “Save“ button.
Hope the information was useful for you! Thanks for paying attention!