In this tutorial, we’ll demonstrate how to create a simple billing system in EspoCRM. All actions will be performed via the user interface without any coding. This tutorial assumes that you have the Advanced Pack extension installed.
Requirements:
- A billing transaction record signifies the amount of money that a customer either deposited (in anticipation of future services) or expended (received the service).
- Each customer should be able to see their current balance on the portal. The balance is the sum of all transactions.
- CRM users should be able to see the current balance on the Account detail view.
Entity
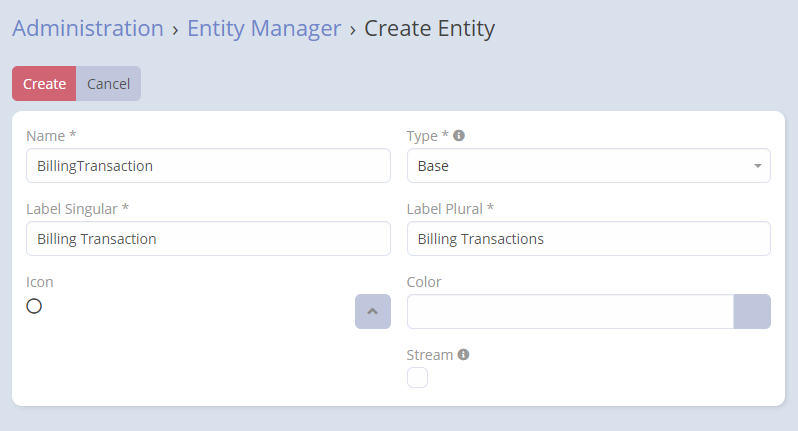
We will start by creating a new entity type called Billing Transaction. Follow Administration > Entity Manager > Create Entity. Specify the name as “Billing Transaction” and leave the default type as Base.
Fields
After creating the entity, open it (in the Entity Manager) and click the Fields button.
Name
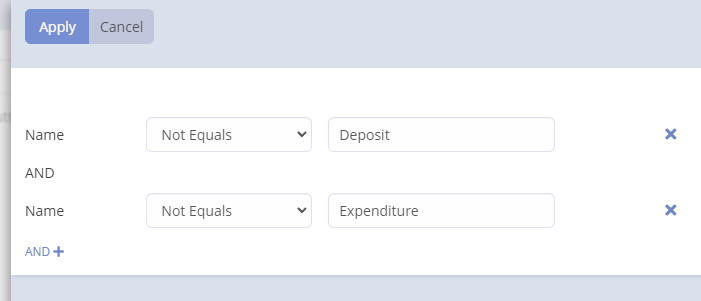
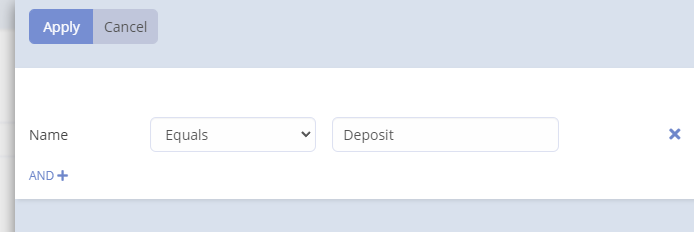
Edit the Name field by clicking on it in the field list view. Add Deposit, Expenditure values in the Options parameter. Check Disable Inline Edit and set Max Length to 11.
Specify Conditions making field invalid in the Dynamic Logic panel. They will ensure that only allowed field names can be entered. See the screenshot.
Number
Add a new field of the Auto-increment type, name it “Number”. This field will store the transaction number.
Amount
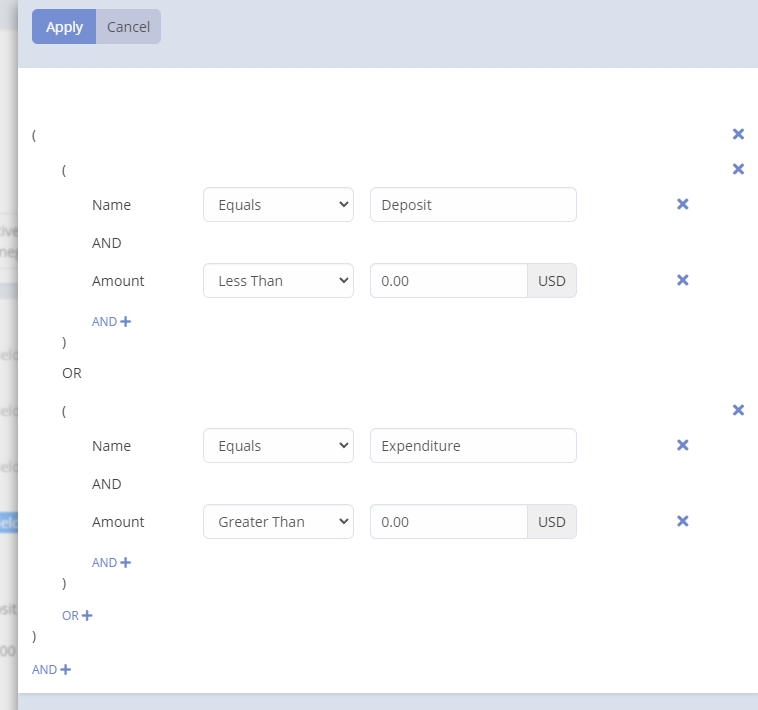
Add a new field of the Currency type, name it “Amount”. Check all the following checkboxes: Required, Only default currency, Disable Conversion, Decimal, Disable Inline Edit.
Specify Conditions making field invalid in the Dynamic Logic panel. They will ensure that only negative values can be entered when the transaction is Expenditure and only positive when Deposit. See the screenshot.
Relationships
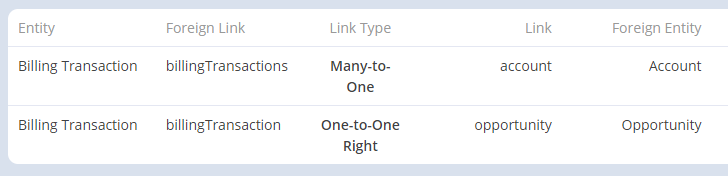
In the Entity Manager, on the Entity page, click the Relationships button. Create two relationships:
- Many-to-One with Account entity type; check the Audited checkbox for it.
- One-to-One Right with Opportunity.
Now, return to fields and edit the Opportunity field which was created along with the relationship. Specify Conditions making field visible (in the Dynamic Logic panel) to make the field only visible for Deposit transactions.
Layouts
In the Entity Manager, on the entity page, click the Layouts button. Add the created fields on the List, Detail and Search Filters layouts.
Portal
Create a portal (if you have not created it before) at Administration > Portal. Create a Portal Role for it.
In the Portal Role, define roles for Billing Transactions and Reports scopes according to the screenshot:
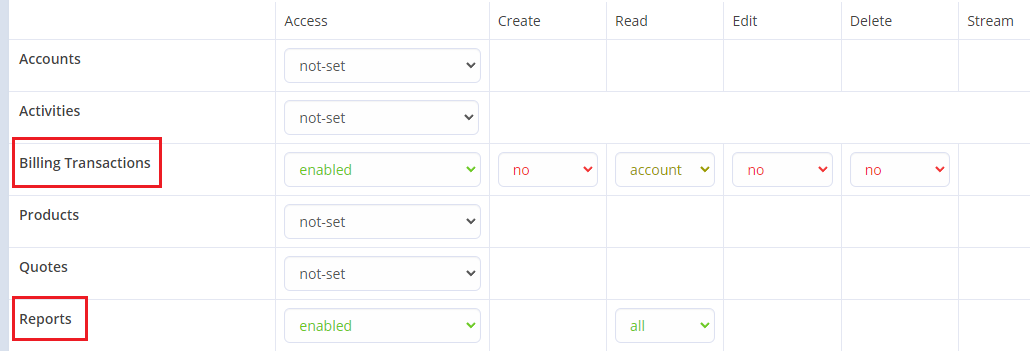
By granting “all” access level for Reports, we allow portal users to view reports that are explicitly associated with the portal.
Report
Create a new report of the Grid type for the Billing Transaction entity type. Add SUM:Amount column, check Apply ACL and add the Customer Portal.
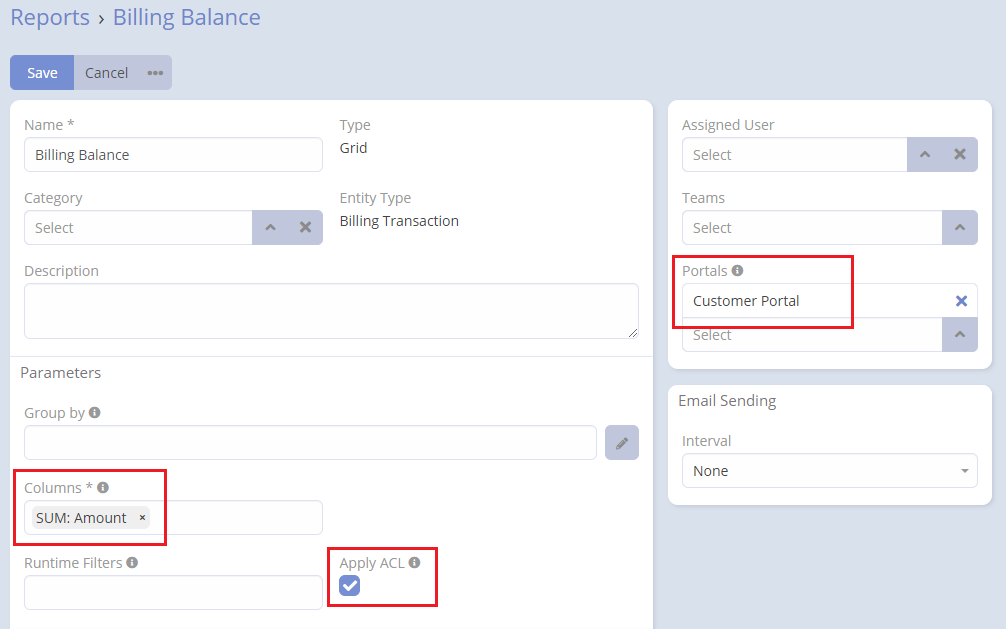
Note that the Apply ACL parameter is important as it will filter data when viewed from the portal so that only records associated with the current user’s account are aggregated.
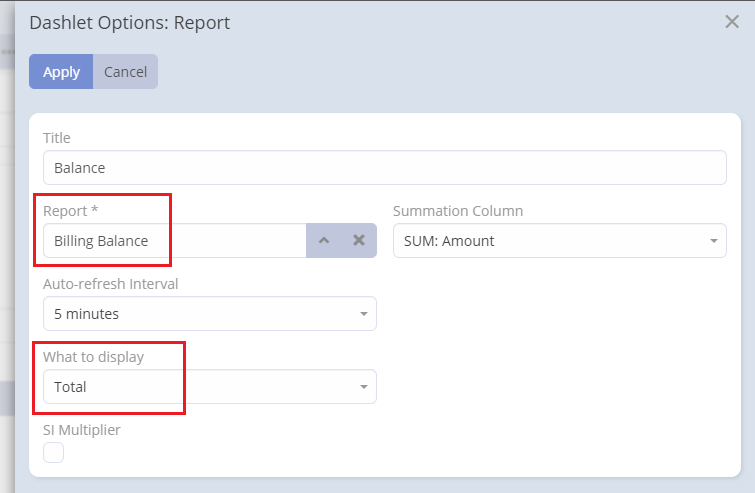
Edit the portal again. Add the Report dashlet on the Dashboard Layout. Select our created report, pick Total.
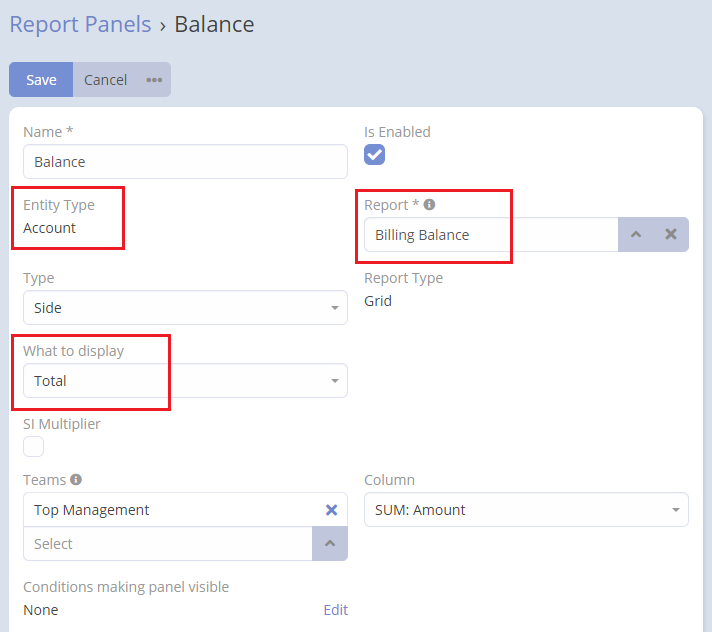
Create a report panel at Administration > Report Panels. Select the Account entity type, select our created report, pick Total. Optionally, you can specify for which teams the panel will be available.
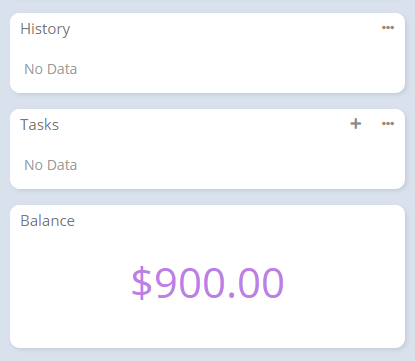
Result
On the Account detail view, we can see the current balance which is the sum of all transactions related to the Account. On the Customer Portal dashboard, the customer can see their current balance which is the sum of all transactions related to their Account.
By utilizing the Workflows and/or BPM tools, it’s possible to automate the billing process. For example, we can automatically create an expenditure transaction when a task is completed.