In customer service, customer satisfaction often correlates with how little effort a customer has to expend to get help or an update. Ideally, both should be available quickly, automatically, and without the customer feeling like they are bothering anyone. But most of the time, that’s not what happens.
Customer requests for case statuses, project updates, or file downloads are flooding your team’s inbox, and before you know it, a huge part of your week is spent manually sharing information that’s already in your CRM. A self-service portal saves that time by giving customers a place to ask questions, find answers, and review records themselves.
EspoCRM offers Portal functionality that lets you create a custom customer portal and control what customers see when they log in, which records they can view and edit, and what actions they can perform. None of this requires writing code or editing configuration files. Still, to save you from jumping back and forth between menus, you do need to know which settings to configure and in what order. That is what we are going to cover step by step in this guide.
Quick tour
Get started with our quick tour to learn how to set up a portal. Click on hotspots or use the arrow keys to move through steps.
Understanding the role of customer portals
A customer portal is a private, login-protected way to access CRM data, create and edit certain records, and communicate with your team. It is useful for support teams, agencies that work with multiple projects, and companies that regularly collect information from the people they work with.
Inside the portal, customers can:
- Create, edit, and delete certain types of records, e.g. support requests (instead of writing emails);
- Monitor updates, e.g. open cases and their current status (instead of asking you);
- Access and download files you’ve uploaded for them (instead of searching through old emails);
- Review interaction history to see their past activity with your company (instead of requesting it from you);
- Update their own profile information (instead of you updating it manually).
When should you create a customer portal?
Not every business needs a self-service portal. If your engagements are mostly one-off or involve little ongoing back-and-forth with customers, you probably don’t need one. But for service businesses with recurring customer relationships, regular updates, or frequent document exchange, a portal usually saves everyone time.
Here are several signs that your staff will benefit from having a portal:
- You work with the same customers repeatedly over months or years;
- You have a lot of regular customers and managing individual email threads takes lots of time;
- Customers contact you multiple times about the same case, sale, or project;
- You’re forwarding documents or files you’ve already sent before;
- You share or collect lots of documents, reports, or files that customers often revisit;
- Customers are in different time zones and require information access outside business hours.
Steps to set up a customer portal in EspoCRM
Step 1. Planning the structure of your customer portal
A portal configured without planning can technically function, but might not reflect how your customers actually expect to use it. Before setting anything up in the system itself, take time to plan the portal structure.
Start by identifying the reasons customers currently reach out to you. If the list isn’t immediately obvious, the answer is usually hidden in your inbox. Review your email folders and look for recurring requests. Any category that requires your direct attention more than three times a week is a sign that the topic belongs in your portal. At the same time, try to keep this list lean. A portal with too much information is almost as unhelpful as one with too little, so it’s better to start small and expand gradually.
Defining your portal’s content often reveals distinct portal user personas who will use it and need different data. For example, some users will track project tasks and milestones, others will download invoices or access task approvals, and a third group will only submit support cases and browse your knowledge base. In this case, you can either create several separate portals tailored to each specific customer type or, if that isn’t practical for your processes, use portal roles to configure permissions. The second approach lets you use a single portal while showing each user only the tasks and data relevant to them.
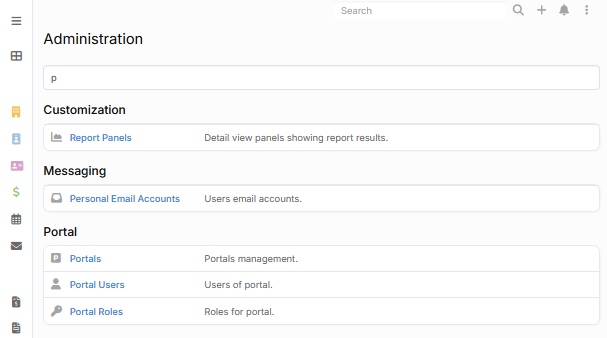
Once the planning is done, you can move on to configuration. In EspoCRM, setting up your customer portal takes three steps in the Administration Panel: you’ll start by defining permissions through Portal Roles, then create the Portal itself, and finish by onboarding your Portal Users.
Step 2. Setting up Portal Roles
This part of the setup turns your decisions from the planning phase into actual permissions within EspoCRM. Portal Roles define which parts of the system users can see and what they can do with the records they have access to.
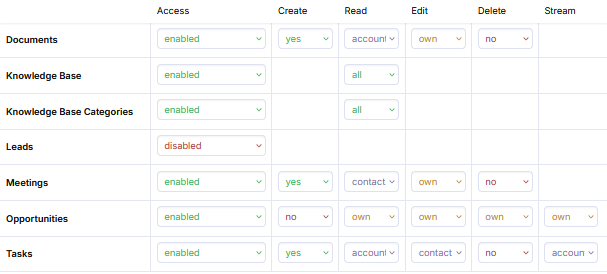
To create a Role, open Administration Panel > Portal Roles > +Create Portal Role. You’ll set permissions at two levels: Scope Level (entity level) and Field Level. Permissions cover Stream access and four action types: Read, Create, Edit, and Delete.
Most portals use a combination of read, edit, and create rights to let customers view their existing records and submit new ones, while preventing them from editing records your team owns or deleting anything.
EspoCRM also lets you create multiple roles and assign them to different users. The question worth answering before you open Portal Roles is how many distinct types of users you will have. Let’s look at two use cases to see how a one-role setup and a multi-role setup differ.
A support-focused portal can work with just one role because you’re only collecting support requests from customers and sharing case updates with them. But for project management, a wider variety of users may be involved. You might have decision makers who only need to see high-level milestones and budget approvals, and external coordinators who should have access to specific tasks and be able to upload files. Managing these through separate roles allows you to ensure that everyone has access only to records that are relevant to their level of responsibility.
Lastly, it is always better to start with tighter permissions than granting broad access and trying to pull it back after customers are already familiar with certain data or actions.
Step 3. Configuring the portal itself
With roles in place, you can start creating the portal in Administration > Portals. The configuration is organized into three tabs.
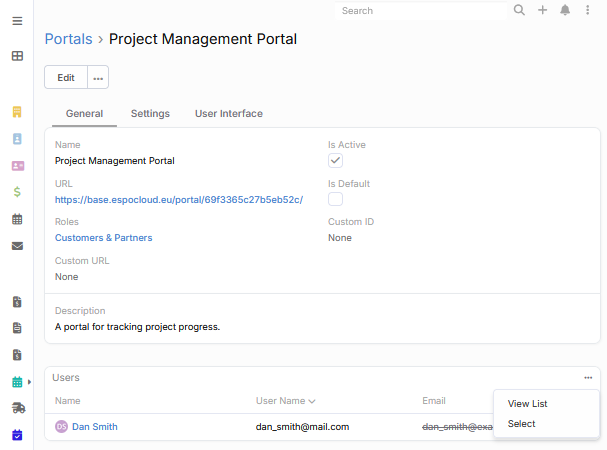
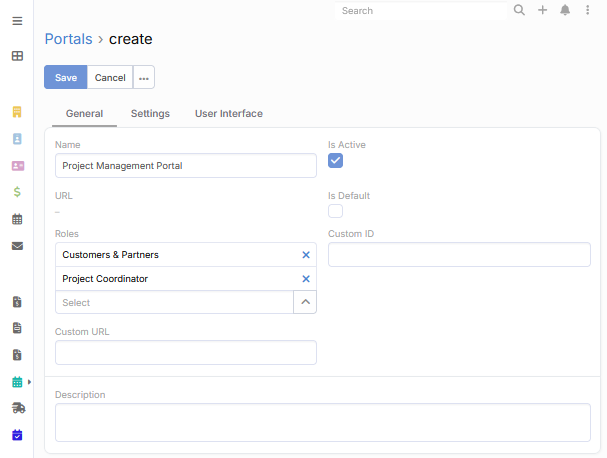
The General tab comes first and covers the basic settings: a name for the portal, options to set it as active and default, a description, and the roles you created in the previous step. EspoCRM generates the portal URL automatically; you just copy and share it with customers later. But if you want to use your own domain rather than EspoCRM’s default, there is a Custom URL field for that.
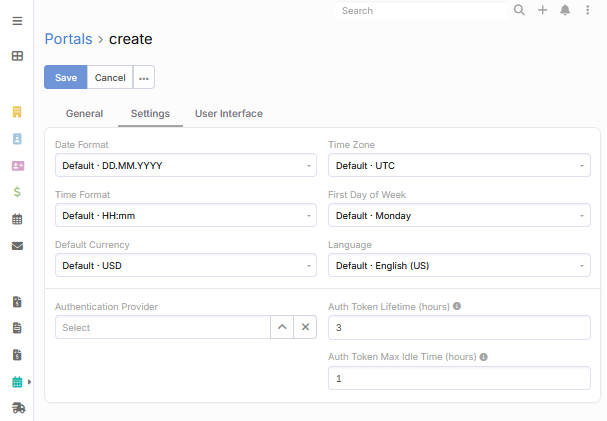
Under the Settings tab, you can set regional and authentication preferences. The defaults here cover date format, time zone, time format, currency, and language. For a global customer base, adjusting the first day of the week, currency, or time format can make the portal feel much more familiar to customers. The authentication settings include authentication providers (if enabled), token lifetime, and idle timeout that control how long a customer session stays active before requiring a new login.
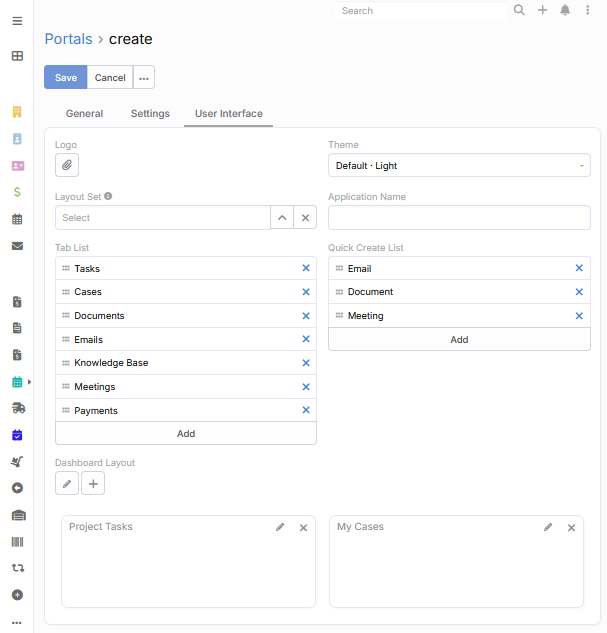
The User Interface tab shapes what customers see. Here, you can upload your logo, select a theme, and choose which dashlets customers see when they log in. The Tab List determines which entities appear in the portal navigation and the Quick Create List is useful for the types of records that customers create most often.
Step 4. Adding Portal Users
The last part is creating accounts for the customers who will be logging in. Go to Administration > Portal Users > +Create Portal User.
EspoCRM gives you two options here:
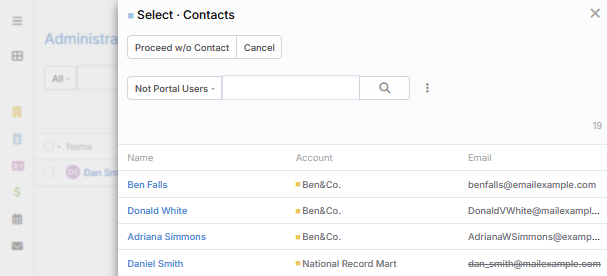
- Creating a portal user from an existing contact. If the customer already exists as a contact, you can create their portal user from that record. Select the contact from the list and their name, email, and phone number will be filled in automatically.
- Creating a portal user from scratch. If the customer is not in the system, click Proceed w/o Contact and fill in the contact details. You can link the portal user to a contact record later if one is created.
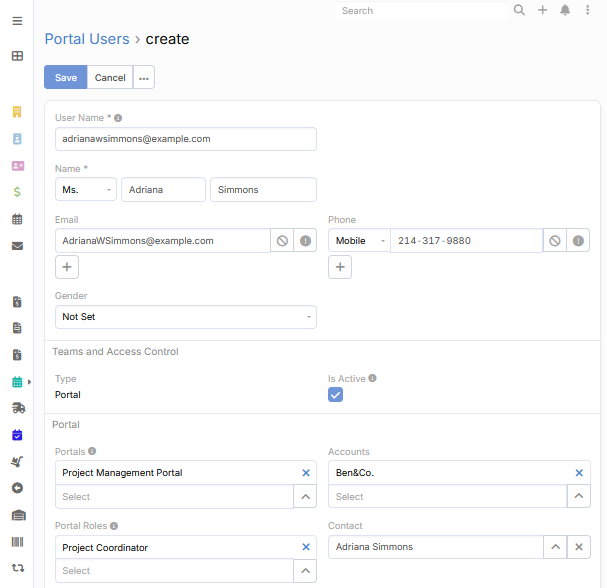
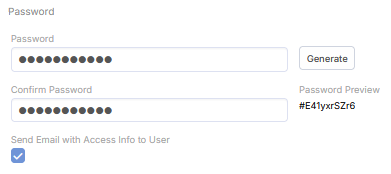
From here, the process is the same. You enter or check basic details (user name, email, phone number), connect the user to the right portal (Step 3) and role (Step 2), and set or generate a password. The system can automatically email the portal link and login details to the customer.
Portal users can also be added directly from the portal record. Open the relevant portal, find the Users panel at the bottom, and add users from there. This saves a few clicks when you’re onboarding a large group of customers to an existing portal in one session.