Exporting contact data from Bitrix24
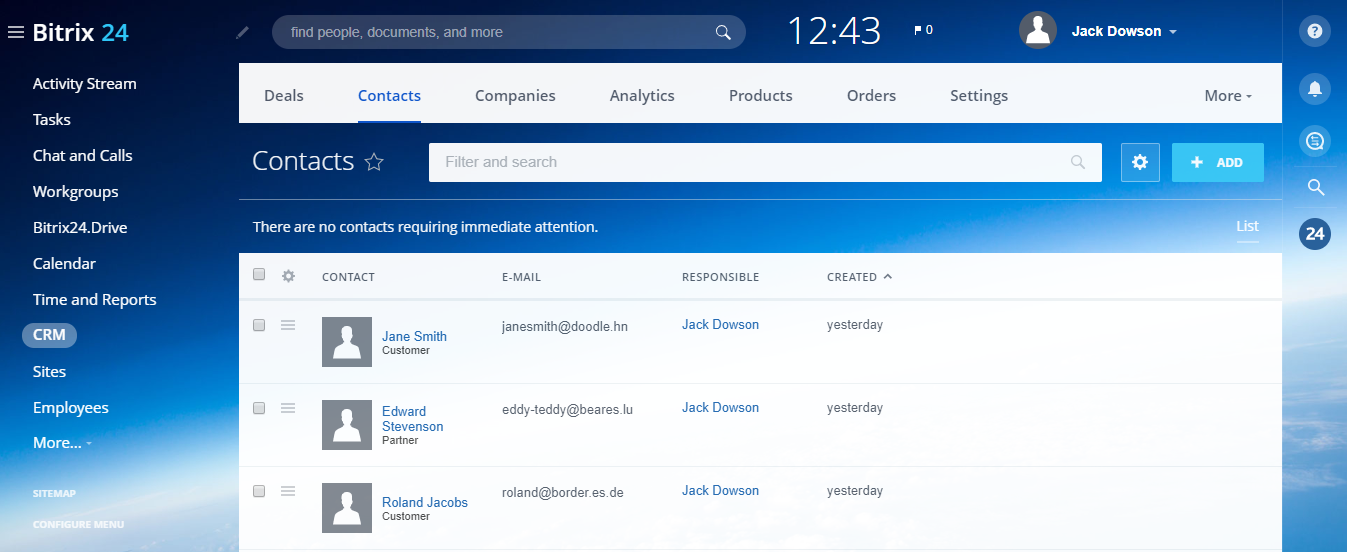
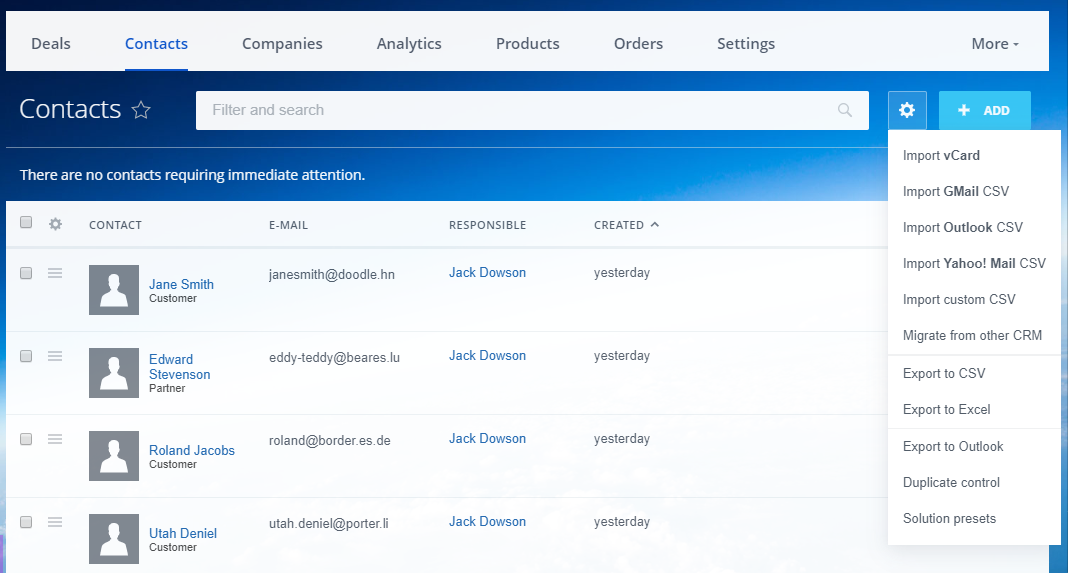
In order to get the contact information out of Bitrix24, navigate to CRM module and click Contacts. Exporting feature is available in the List View of the Contacts module. To start exporting contact data, click the cogwheel button on the top and select Export to CSV option.
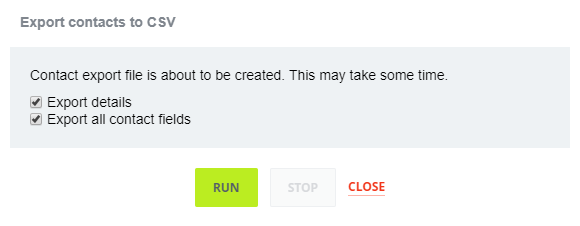
In the next window, you can choose either to export only the fields from the List view or to extract all the contact data from the system by ticking off Export details & Export all contact fields options. Once everything configured, click Run and wait till the file with exported contacts is generated.
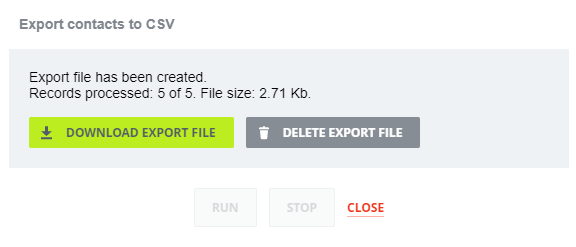
When the export is finished, you will be able to see the number of exported contacts and the size of the export file. Click Download export file and save it to your computer.
To find more information on the topic, follow the link:
https://helpdesk.bitrix24.com/open/4777225/
All trademarks belong to their respective owners.
Importing data into EspoCRM
As soon as you have the export file with customer data, you can start importing it into your EspoCRM instance. The system allows you to import information in CSV file format.
In order to migrate data, at first navigate to Administration and click Import in Data section. The import process happens in three steps. Let’s dive in and take a closer look at each step.
Step 1
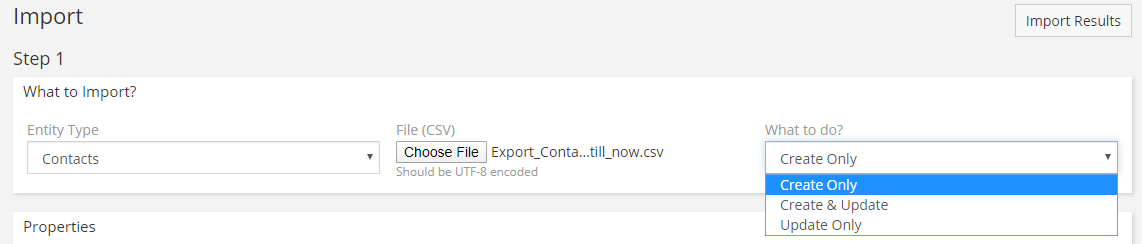
The first thing to do here is to determine the type of records that are going to be imported. In this case, select Contacts from the Entity Type list. Then, click Choose File and upload the CSV file you’ve exported from your previous CRM system. The next stage is to decide what should be done with the imported records. In What to do? section, there are 3 options “Create Only”, “Create & Update”, “Update Only” that allow both to create new records and update the information in the existing ones if you used CRM systems simultaneously.
Once you’ve finished with the previous configurations, you can proceed to define the import properties. Select the correct field delimiter, text qualifier, and format for person name, date, time, timezone and currency. If you’re importing a large amount of data, it’s better to tick off Execute in idle. You can also Skip searching for duplicates to make the execution of import faster if you’re sure that there’re no duplicated contacts. The Silent mode option allows to skip most of after-save scripts and workflows, which also increases the speed of import. In the Preview panel, you will be able to see how the data will be parsed. When you change properties, the preview is updated. If everything is correct, click Next and proceed to Step 2.

Step 2
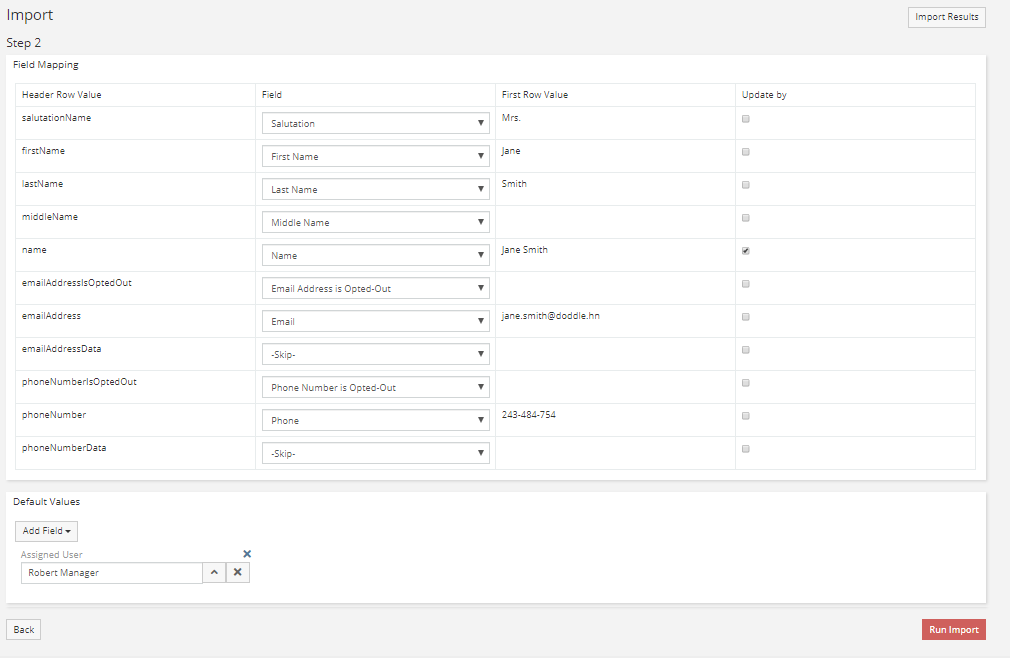
Field Mapping panel shows how fields correspond to columns of the CSV file. You can skip importing not needed columns here by choosing the Skip option from the list. If you chose not only to create but also to update records, you will need to tick off fields by which the system will match the records that should be updated. In the Default Values section, you can add fields to the imported records, which is useful, for example, if you want to assign them to a particular user or team. Once everything is configured here, click Run Import and proceed to Step 3.
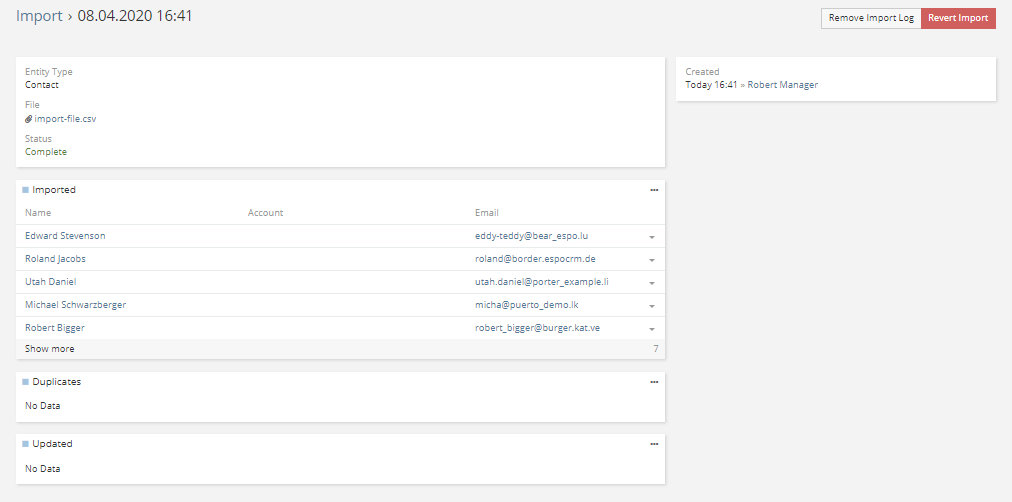
Step 3
At this point, you can see the list of imported, updated and duplicated records. Now you can check if the imported data is correct and Remove Import Log to prevent an accidental reverting of the import. If there are some issues with fields in the imported records, you can Revert import and try again.